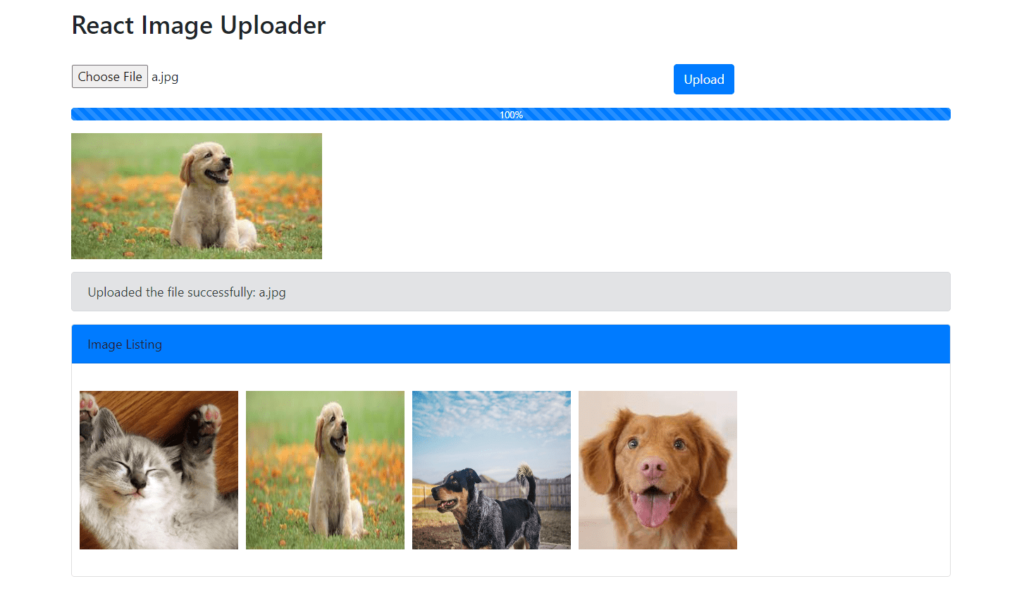
In our previous React JS tutorial, we have explained how to implement React Multi Select Dropdown with Instant Search. In this tutorial, we will explain how to upload images with preview and progress bar in React using REST API.
File or image upload is an important part of any web application. Here we will implement image upload in React using REST API to upload images. We will make HTTP request using Axios to upload images and list uploaded images.

We will cover following in this tutorial:
- Browse image to upload.
- Display preview of image before uploading.
- Display image upload progress bar during image upload.
- Display upload uploaded images
- List all uploaded images.
The API end points for upload and listing images:
| Methods | End Point | Action |
|---|---|---|
| POST | /upload | upload a File |
| GET | /files | get List of Files |
Prerequisites
- Need Node.js development environment installed.
- Axios 0.27.2
- Bootstrap 4
Setup Project and Structure
First we will create React application using the create-react-app command. Here we will create react-images-uploader to implement image upload and listing.
npx create-react-app react-images-uploader
Now we will go inside project folder.
cd react-images-uploader
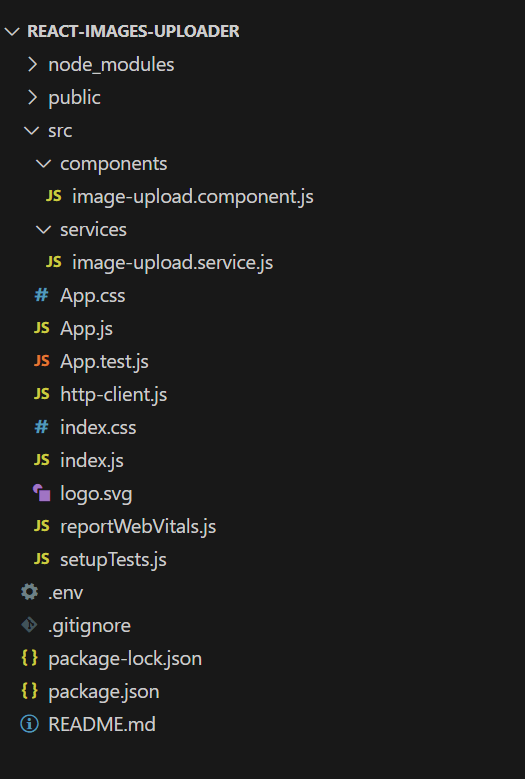
We will have following major files in our project:
- App.js: This is a main app container that embed all component.
- http-client.js: In this file, we initializes Axios with HTTP base Url and headers.
- image-upload.service.js: In this file, we HTTP request using Axios.
- image-upload.component.js: This file contains upload form, image preview, progress bar, display list of images.

Install Required Modules
We need to install axios module for making HTTP request to upload and list files.
npm install axios@0.27.2
We will use Bootstrap 4 framework for design.
npm install bootstrap@4.6.2
Initialize HTTP Client
We will create src/http-client.js file and intialize HTTP client and header for making http request to api. Here we have used http://localhost:8080 API Server to upload and get files. You can check here to create file upload REST API with Node js to use with react image upload.
http-client.js:
import axios from "axios";

export default axios.create({
  baseURL: "http://localhost:8080",
  headers: {
    "Content-type": "application/json"
  }
});
Create Image Upload Service
We will create src/services/image-upload.serivce.js file and create method upload() and getFiles() using HTTP client.
image-upload.serivce.js:
import http from "../http-client";

class ImageUploadService {

  upload(file, onUploadProgress) {

    let formData = new FormData();

    formData.append("file", file);

    return http.post("/upload", formData, {
      headers: {
        "Content-Type": "multipart/form-data",
      },
      onUploadProgress,
    });
  }

  getFiles() {
    return http.get("/files");
  }
}

export default new ImageUploadService();
Create Image Upload Component
We will create src/component/image-upload.component.js component file and implement to create upload form, display image preview, progress bar and display list of images.
image-upload.component.js:
import React, { Component } from "react";
import UploadService from "../services/image-upload.service";

export default class UploadImages extends Component {
  constructor(props) {
    super(props);
    this.selectFile = this.selectFile.bind(this);
    this.upload = this.upload.bind(this);

    this.state = {
      currentFile: undefined,
      previewImage: undefined,
      progress: 0,
      message: "",

      imageInfos: [],
    };
  }

  componentDidMount() {
    UploadService.getFiles().then((response) => {
      this.setState({
        imageInfos: response.data,
      });
    });
  }

  selectFile(event) {
    this.setState({
      currentFile: event.target.files[0],
      previewImage: URL.createObjectURL(event.target.files[0]),
      progress: 0,
      message: ""
    });
  }

  upload() {
    this.setState({
      progress: 0,
    });

    UploadService.upload(this.state.currentFile, (event) => {
      this.setState({
        progress: Math.round((100 * event.loaded) / event.total),
      });
    })
      .then((response) => {
        this.setState({
          message: response.data.message,
        });
        return UploadService.getFiles();
      })
      .then((files) => {
        this.setState({
          imageInfos: files.data,
        });
      })
      .catch((err) => {
        this.setState({
          progress: 0,
          message: "Could not upload the image!",
          currentFile: undefined,
        });
      });
  }

  render() {
    const {
      currentFile,
      previewImage,
      progress,
      message,
      imageInfos,
    } = this.state;

    return (
      <div>
        <div className="row">
          <div className="col-8">
            <label className="btn btn-default p-0">
              <input type="file" accept="image/*" onChange={this.selectFile} />
            </label>
          </div>

          <div className="col-4">
            <button
              className="btn btn-primary "
              disabled={!currentFile}
              onClick={this.upload}
            >
              Upload
            </button>
          </div>
        </div>

        {currentFile && (
          <div className="progress my-3">
            <div
              className="progress-bar progress-bar-info progress-bar-striped"
              role="progressbar"
              aria-valuenow={progress}
              aria-valuemin="0"
              aria-valuemax="100"
              style={{ width: progress + "%" }}
            >
              {progress}%
            </div>
          </div>
        )}

        {previewImage && (
          <div>
            <img className="preview" src={previewImage} alt="" />
          </div>
        )}

        {message && (
          <div className="alert alert-secondary mt-3" role="alert">
            {message}
          </div>
        )}

        <div className="card mt-3">
          <div className="card-header bg-primary">Image Listing</div>
		  <br />
		  <div className="row">
			{imageInfos &&
              imageInfos.map((img, index) => (
				<div className="col-md-2" style={{margin:'10px'}}>
					<img width="200" height="200" src={img.url} alt={img.name} />
				</div>
			 ))}
		   </div>
			<br />
        </div>
      </div>
    );
  }
}
Use Image Upload Component in App
We will open src/App.js and import image upload component. Then we will use component tag.
App.js:
import React from "react";
import "./App.css";
import "bootstrap/dist/css/bootstrap.min.css";

import UploadImages from "./components/image-upload.component";

function App() {
  return (
    <div className="container">
	  <br />
      <h2>React Image Uploader</h2>
	  <br />
      <div className="content">
        <UploadImages />
      </div>
    </div>
  );
}

export default App;
Create .env File and Define Port
We will create .env file on root of project and define port.
PORT=8081
Run Application
We will run our application using below command:
npm start
The application will run on following url:
http://localhost:8081/