In our previous tutorial, we have explained how to convert CSV data to JSON with JavaScript. In this tutorial, you will learn how to Observe Changes in DOM using Mutation Observers in JavaScript when any element added, removed or attribute changed in DOM.
While loading dynamic data with Ajax, we append data with new HTML elements to already loaded HTML page. As the dynamic data HTML appended after DOM load, the existing front-end functionality will not work with new appended HTML element because the specific functions not initialize that new elements.
So we need to detect newly added DOM elements related to that specific functions and then we need to initialize that elements. If you’re struck with such problems and looking for solutions, then you’re here at right place.
The MutationObserver is a JavaScript browser API to detect DOM changes and it’s supported by all modern browsers. We will cover this tutorial with live demo to add dynamic element with attributes to page and then detect newly added element using MutationObserver API API.
Also, read:
- Read CSV File using JavaScript
- Copy Text to Clipboard with JavaScript
- How to Refresh or Reload Page using JavaScript
- Build Barcode Generator with JavaScript
- Convert CSV Data to JSON using JavaScript with Example
- Build Timestamp Converter to Date with JavaScript
So let’s create example to Observe Changes in DOM using Mutation Observers In JavaScript. The file structure of this example is following.
- index.php
- mutation_observer.js
Step1: Create HTML to Add New Element
First we will create HTML in index.php to add dynamic element to page.
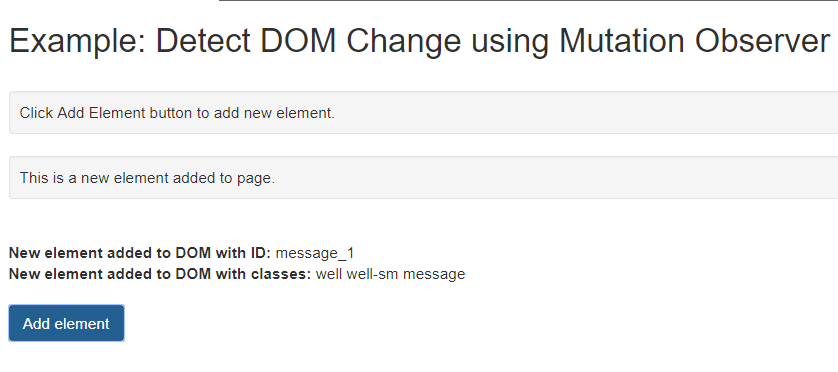
<div class="container">
<h2>Example: Detect DOM Change using Mutation Observer with Example</h2>
<div id="containerBody" class="well well-sm message">Click Add Element button to add new element to DOM.</div>
<div><span id="labelID" class="hidden"><strong>New element added to DOM with ID: </strong></span><span id="addNodeId"></span></div>
<div><span id="labelClass" class="hidden"><strong>New element added to DOM with classes: </strong></span><span id="addNodeClass"></span></div>
<button id="addElement" class="btn btn-primary">Add element</button>
</div>
Step2: Add Dynamic Element to Page
Now in mutation_observer.js file, we will add dynamic element to page with class and id attribute when click button.
$("#addElement").click(function() {
	var totalElement = $(".message").length;
	$("#containerBody").after("<div id='message_"+totalElement+"' class='well well-sm message'>This is a new element added to DOM.</div>");
});
Step3: Detect Changes in DOM with MutationObserver
In mutation_observer.js file, we will use MutationObserver instance to detect DOM changes. Here we will check for class message to detect if it is added to DOM and display newly added element id and clss attribute. We can handle our functions here according to our requirement to work with dynamic HTML that’s added to page after DOM load. We have checked here mutations addedNodes attribute to check for new node. You can use removedNodes to check for element remove.
// Create an observer instance
var observer = new MutationObserver(function( mutations ) {
	mutations.forEach(function( mutation ) {
		var newNodes = mutation.addedNodes;
		// If there are new nodes added
		if( newNodes !== null ) {
			var $nodes = $( newNodes );
			$nodes.each(function() {
				var $node = $( this );
				// check if new node added with class 'message'
				if( $node.hasClass("message")){
					$("#addNodeId").text($($node).attr('id'));
					$("#addNodeClass").text($($node).attr('class'));
				}
			});
		}
	});
});
// Configuration of the observer:
var config = {
	childList: true,
	attributes: true,
	subtree: true,
	characterData: true
};
var targetNode = document.body;
observer.observe(targetNode, config);
You may also like:
- Follow and Unfollow System with PHP & MySQL
- GST Billing System with PHP & MySQL
- Restaurant Management System with PHP & MySQL
- Visitor Management System with PHP & MySQL
- Student Attendance System with PHP & MySQL
- Like and Dislike System with Ajax, PHP & MySQL
- Build Star Rating System with jQuery, PHP & MySQL
- User Registration and Login System with PHP & MySQL
- Build Contact Form with PHP and Ajax
- To-do List Application with Ajax, PHP & MySQL
- Build Event Calendar with jQuery , PHP & MySQL
You can view the live demo from the Demo link and can download the source from the Download link below.
Demo Download