In our previous tutorial, we have explained how to upload multiple files with jQuery, PHP and MySQL. In this tutorial, you will learn how to implement file upload in React.
File upload is an important functionality of web applications to allow user to upload files. The file upload feature needed to upload user profile picture or avatar, create image gallery or upload document etc.
We will use Node server to handle file upload at server end in React application.
We will cover this tutorial step by step to create React application, install dependencies and then implement file upload in React application with example.
Also, read:
- Create Simple Form with Validation in React
- Best PDF Viewer Component for React
- How to Map Components in React
- How to Make API Call in React
So let’s get started with the tutorial to upload file in React application. Before proceeding, you have to make sure you have Node and npm installed on your computer.
Step1: Create React Application
First we will create React application file-upload-react using following command.
npx create-react-app file-upload-react
We will go the react project file-upload-react
cd file-upload-react
Now we will install React application dependencies using following command:
npm install bootstrap
npm install react-toastify
npm install axios
We will insatll bootstrap to create ui based on bootstrap 4. We will make changes in src/index.js to add below line to include Bootstrap CSS.
import 'bootstrap/dist/css/bootstrap.css';
The react-toastify module is used to display beautiful notification into React application and axios module for HTTP client which we will use to communicate with the Node server to upload files to the server.
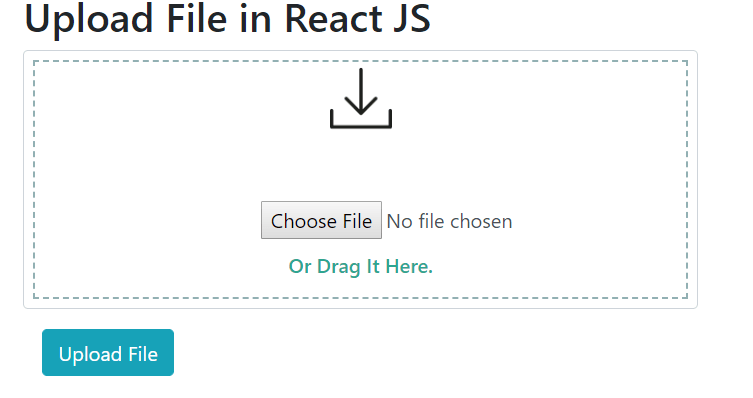
Step2: Create File Upload Form
We will make changes in app.js to add following code to design file upload form.
render() {
  return (
	<div className="container">
		<div className="row">
			<div className="col-md-6">
				<form method="post" action="#" id="#">
					<div className="form-group files">
						<h2>Upload File in React JS </h2>
						<ToastContainer />
						<input type="file" name="file" className="form-control" onChange={this.changeHandler}/>
					</div>
					<div className="col-md-6 pull-right">
						<button width="100%" type="button" className="btn btn-info" onClick={this.fileUpload}>Upload File</button>
					</div>
				</form>
			</div>
		</div>
	</div>
  );
}
We will call method changeHandler on onchange event of input to set the file information into state. We will also call fileUpload method on button onclick event to make HTTP request to node server using axios HTTP client.
Step3: Create React File Upload Component
We will also add following code to app.js to create react file upload component functionality.
changeHandler=event=>{
var uploadFile = event.target.files[0];
	if(this.validateFileSize(event)){
	  this.setState({
		selectedFile: uploadFile
	  });

	}
}
fileUpload = () => {
const formData = new FormData()
formData.append('file', this.state.selectedFile)
axios.post(BASE_URL + 'upload', formData)
  .then(res => {
	toast.success('File uploaded successfully')
  })
  .catch(err => {
	toast.error('File upload failed')
  })

};
validateFileSize=(event)=>{
	let uploadFile = event.target.files[0];
	let size = 30000;
	let err = '';
	if (uploadFile.size > size) {
		err = uploadFile.type+' is too large, please select a smaller file\n';
		toast.error(err);
	}
	return true
};
The changeHandler method created to take file name from input and validate file size.
The validateFileSize method created to validate file size and throw message to display with toaster.
The fileUpload method created take file from state and send HTTP request to node server to upload file.
Following is the complete code of app.js file.
import React, { Component } from 'react';
import axios from 'axios';
import { ToastContainer, toast } from 'react-toastify';
import './App.css';
const BASE_URL = 'http://localhost:5000/';

class App extends Component {
	constructor(props) {
	super(props);
	  this.state = {
		selectedFile: null
	  }
	};

	changeHandler = event=>{
	var uploadFile = event.target.files[0];
		if(this.validateFileSize(event)){
		  this.setState({
			selectedFile: uploadFile
		  });

		}
	}
	fileUpload = () => {
	const formData = new FormData()
	formData.append('file', this.state.selectedFile)
	axios.post(BASE_URL + 'upload', formData)
	  .then(res => {
		toast.success('File uploaded successfully')
	  })
	  .catch(err => {
		toast.error('File upload failed')
	  })

	};

	validateFileSize=(event)=>{
		let uploadFile = event.target.files[0];
		let size = 30000;
		let err = '';
		if (uploadFile.size > size) {
			err = uploadFile.type+' is too large, please select a smaller file\n';
			toast.error(err);
		}
		return true
	};

	render() {
	  return (
		<div className="container">
			<div className="row">
				<div className="col-md-6">
					<form method="post" action="#" id="#">
						<div className="form-group files">
							<h2>Upload File in React JS </h2>
							<ToastContainer />
							<input type="file" name="file" className="form-control" onChange={this.changeHandler}/>
						</div>
						<div className="col-md-6 pull-right">
							<button width="100%" type="button" className="btn btn-info" onClick={this.fileUpload}>Upload File</button>
						</div>
					</form>
				</div>
			</div>
		</div>
	  );
	}
}
export default App;
Step4: Create Node Server to Handle File Upload
Now finally we will create Node server which will accept the files submitted and upload them into directory. For this we will create a file at the root of our project folder called server.js and setup server to handle file upload into uploads directory.
We will need following dependencies to install to setup Node server to handle file upload.
npm install --save Express
npm install --save Cors
npm install --save multer
The Node server shuould be like this.
const express = require('express');
const multer = require('multer');
const cors = require('cors');
const app = express();
app.use(express.static('public'))
var storage = multer.diskStorage({
    destination: (req, file, cb) => {
        cb(null, 'public/uploads')
    },
    filename: (req, file, cb) => {
        cb(null, Date.now() + '-' + file.originalname)
    }
});
const upload = multer({
    storage
})
app.use(cors());
app.post('/upload', upload.single('file'), (req, res) => {
    if (req.file)
        res.json({
            imageUrl: '/uploads/${req.file.filename}'
        });
    else
        res.status("409").json("No Files to Upload.");
});
const PORT = 5000;
app.listen(PORT);
console.log('api running on port: ' + PORT);
Step5: Run React Application
Now we will run the React application using following command.
npm start
You will see the React application home page into browser http://localhost:3000.

As the HTTP request made to Node server to upload file, so we will also need to start Node server. We will start node server using following command.
node server.js
Now node server started and you can upload files in React application.
You may also like:
- Follow and Unfollow System with PHP & MySQL
- GST Billing System with PHP & MySQL
- Restaurant Management System with PHP & MySQL
- Visitor Management System with PHP & MySQL
- Student Attendance System with PHP & MySQL
- Like and Dislike System with Ajax, PHP & MySQL
- Build Star Rating System with jQuery, PHP & MySQL
- User Registration and Login System with PHP & MySQL
- Build Contact Form with PHP and Ajax
- To-do List Application with Ajax, PHP & MySQL
- Build Event Calendar with jQuery , PHP & MySQL
You can can download the complete source from the Download link below.
Download