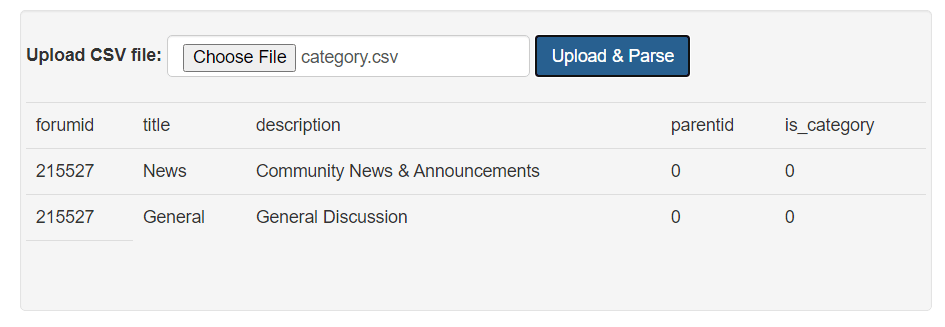
In this tutorial, we will explain how to create CSV file using JavaScript.
CSV (Comma Separated Values) is the most used file format to store data in spreadsheet. It is widely used in web applications to store and read dynamic data. Due to it’s popularity, most of web applications allow users to get data in CSV format and also allowed to upload CSV data and display.
So if you’re developing a web applications and looking for the solutions to read the CSV file using JavaScript, then you’re here at the right place. In this tutorial, you will learn how to read CSV file using JavaScript and display data on page.
We will use the Papa Parse JavaScript CSV parser library to read the CSV file. With this library, we will create a live example to read CSV file and display CSV data on a page.

Also, read:
- Copy Text to Clipboard with JavaScript
- How to Refresh or Reload Page using JavaScript
- Build Barcode Generator with JavaScript
- Convert CSV Data to JSON using JavaScript with Example
- Observe Changes in DOM using Mutation Observers
- Build Timestamp Converter to Date with JavaScript
So let’s implement to read CSV file with JavaScript. The major files are:
- index.php
- read_csv_file.js
Step1: Inlcude jQuery and Library Files
First we will include jQuery and JavaScript library file in index.php file. We will also include papaparse library.
<script src="https://ajax.googleapis.com/ajax/libs/jquery/2.1.3/jquery.min.js"></script>
<script src="papaparse.min.js"></script>
<script src="read_csv_file.js"></script>
Step2: Create CSV File Upload Form
In index.php file, we will create CSV file upload form to read and parse CSV file.
<div class="well">
	<div class="row">
	<form class="form-inline">
		<div class="form-group">
		  <label for="csvFile">Upload CSV file:</label>
		  <input type="file" id="csvFile"  class="form-control" accept=".csv" required />
		</div>
		<div class="form-group">
		 <button type="submit" id="uploadFile" class="btn btn-primary">Upload & Parse</button>
		 </div>
	</form>
	</div>
	<br>
	<div class="row" id="dataList"></div>
</div>
Step3: Intiliaze Papa Parse Library
In read_csv_file.js file, we will initialize Papa Parse Library to read and parse CSV file when click uploadFile button. We will perform parsing on file csvFile file selector and call the function renderCSVData() to display CSV data returned from JavaScript parser.
$('#uploadFile').on("click",function(e){
	e.preventDefault();
	$('#csvFile').parse({
		config: {
			delimiter: "auto",
			complete: renderCSVData,
		},
		before: function(file, inputElem){
			console.log("Parsing file...", file);
		},
		error: function(err, file) {
			console.log("ERROR:", err, file);
		},
		complete: function() {
			console.log("Done with all files");
		}
	});
});
Step4: Display CSV Data from Parser
In read_csv_file.js file, we will implement function renderCSVData() to display CSV in a HTML table. We will loop through CSV data rows and finally set into dataList container.
function renderCSVData(resultsData){
	var tableHTML = "<table class='table'>";
	var results = resultsData.data;
	for(i=0;i<results.length;i++){
		tableHTML+= "<tr>";
		var row = results[i];
		var cells = row.join(",").split(",");
		for(j=0;j<cells.length;j++){
			tableHTML+= "<td>";
			tableHTML+= cells[j];
			tableHTML+= "</td>";
		}
		tableHTML+= "</tr>";
	}
	tableHTML+= "</table>";
	$("#dataList").html(tableHTML);
}
You may also like:
- Follow and Unfollow System with PHP & MySQL
- GST Billing System with PHP & MySQL
- Restaurant Management System with PHP & MySQL
- Visitor Management System with PHP & MySQL
- Student Attendance System with PHP & MySQL
- Like and Dislike System with Ajax, PHP & MySQL
- Build Star Rating System with jQuery, PHP & MySQL
- User Registration and Login System with PHP & MySQL
- Build Contact Form with PHP and Ajax
- To-do List Application with Ajax, PHP & MySQL
- Build Event Calendar with jQuery , PHP & MySQL
You can view the live demo from the Demo link and can download the source from the Download link below.
Demo Download