In our previous tutorial, we have explained how to use TinyMCE editor to save content with Ajax, PHP and MySQL. In this tutorial, we will explain how to implement image upload in TinyMCE editor with Ajax and PHP.
TinyMCE is a well known WYSIWYG HTML Editor which extensively used in web applications to create HTML contents. It supports text formatting, table insert, link insert, image insert and more features.
TinyMCE has many plugins that allows insert image into editor through different sources. But it’s not allowed to browse image and upload to server to insert into editor. For this, we need to develop our own functionality.
So if you’re looking for solution for TinyMCE image upload to insert image into TinyMCE editor then here at the right place.
Also, read:
We will cover this tutorial step by step with live demo to upload image from TinyMCE editor and insert into editor.
So let’s implement TinyMCE image upload with Ajax and PHP. The major files are:
- index.php: PHP file to load TinyMCE editor.
- tinymce_editor.js: A JavaScript file to initialize TinyMCE editor and Image upload Ajax.
- upload.php: A PHP file to handle image upload to server.
Step1: Include TinyMCE and jQuery
We have downloaded the TinyMCE editor and stored into folder tinymce and included into index.php file. We will also include jQuery and custom Javascript tinymce_editor.js file.
<script src="https://ajax.googleapis.com/ajax/libs/jquery/2.1.3/jquery.min.js"></script>
<script src="tinymce/tinymce.min.js"></script>
<script src="js/tinymce_editor.js"></script>
Step2: Create Form with Textarea
In index.php file, we will create a Form with Textarea to load TinyMCE editor.
<div class="container">
	<div class="row">
		<form id="posts" name="posts" method="post">
			<textarea name="message" id="message"></textarea><br>
		</form>
	</div>
</div>
Step3: Initialize TinyMCE Editor
In tinymce_editor.js file, we will initialize TinyMCE editor to convert Textarea into TinyMCE WYSIWYG HTML Editor.
tinymce.init({
	selector: "textarea",
	plugins: "code",
	toolbar: "undo redo | bold italic | alignleft aligncenter alignright alignjustify | bullist numlist outdent indent | link code image_upload",
	menubar:false,
    statusbar: false,
	content_style: ".mce-content-body {font-size:15px;font-family:Arial,sans-serif;}",
	height: 200
});
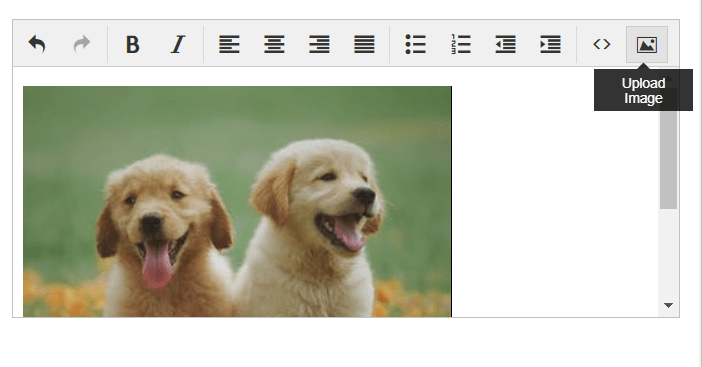
Step4: Add Image Upload Button
In tinymce_editor.js file, we will implement functionality to add image upload icon to TinyMCE toolbar. We will also need to add button name image_upload to toolbar.
setup: function(ed) {
	ed.addButton('image_upload', {
		tooltip: 'Upload Image',
		icon: 'image',
		onclick: function () {
			fileInput.trigger('click');
		}
	});
}
Step5: Handle Image Browse and Upload
In tinymce_editor.js file, we will implement functionality to browse image on image upload button click and make Ajax request to upload.php file to upload image to server and also insert image to TinyMCE editor.
var fileInput = $('<input id="tinymce-uploader" type="file" name="pic" accept="image/*" style="display:none">');
$(ed.getElement()).parent().append(fileInput);

fileInput.on("change",function(){
	var file = this.files[0];
	var reader = new FileReader();
	var formData = new FormData();
	var files = file;
	formData.append("file",files);
	formData.append('filetype', 'image');
	jQuery.ajax({
		url: "upload.php",
		type: "post",
		data: formData,
		contentType: false,
		processData: false,
		async: false,
		success: function(response){
			var fileName = response;
			if(fileName) {
				ed.insertContent('<img src="upload/'+fileName+'"/>');
			}
		}
	});
	reader.readAsDataURL(file);
});
Step6: Upload Image to Server
In upload.php file, we will implement functionality to upload the image file to server into upload folder and return response as uploaded file name.
<?php
$fileName = $_FILES['file']['name'];
$fileType = $_POST['filetype'];
if($fileType == 'image'){
  $validExtension = array('png','jpeg','jpg');
}
$uploadDir = "upload/".$fileName;
$fileExtension = pathinfo($uploadDir, PATHINFO_EXTENSION);
$fileExtension = strtolower($fileExtension);
if(in_array($fileExtension, $validExtension)){
   if(move_uploaded_file($_FILES['file']['tmp_name'],$uploadDir)){
    echo $fileName;
  }
}
?>
You may also like:
- Follow and Unfollow System with PHP & MySQL
- GST Billing System with PHP & MySQL
- Restaurant Management System with PHP & MySQL
- Visitor Management System with PHP & MySQL
- Student Attendance System with PHP & MySQL
- Like and Dislike System with Ajax, PHP & MySQL
- Build Star Rating System with jQuery, PHP & MySQL
- User Registration and Login System with PHP & MySQL
- Build Contact Form with PHP and Ajax
- To-do List Application with Ajax, PHP & MySQL
- Build Event Calendar with jQuery , PHP & MySQL
You can view the live demo from the Demo link and can download the source from the Download link below.
Demo Download