In our previous tutorial, we have explained about Chat Application with Node.js, Express & MongoDB. In this tutorial, you will learn how to implement user authentication and Authorization in Node.js.
Authentication and authorization is an important part of any web applications. There can be many routes in a application that provides resources to users. If the authentication and authorization is not handled properly then sensitive information can compromised. So it is very important to provide proper user authentication to provide access to the different resources.
So if you’re developing application with Node.js and wants to implement authentication and authorization, then you’re here at the right place.
Also, read:
We will cover following in this tutorial:
- The client sends credentials to the server.
- The server verifies the credentials, generates a token and sends it back as a response.
- The requests from the client have a token in the request headers.
- Server validates the token and if valid, provide the requested response.
- Validate the required user fields and user existence.
So let’s proceed with coding. We will create project directory authentication_authorization_nodejs and have following file structure.
- package.json
- index.js
- config/database.config.js
- config/default.json
- middleware/auth.js
- models/user.model.js
- routes/user.route.js
Step1: Create Application
First we will create our application directory authentication_authorization_nodejs.
we will go to the root directory of our application and type npm init to initialize our application with a package.json file.
$ cd authentication_authorization_nodejs
$ npm init
Step2: Install Dependency
We will use following dependency into our application for handling authentication and authorization.
- config : Used to retrieve PrivateKey from config/default.json
- joi : Validation function
- express : Web framework
- mongoose : Used to create models and schema
- jsonwebtoken : Used to generate and verify JWT
- bcrypt : Used to hashing the password to store in the database
We will install the dependency modules using following command.
$ npm i config joi express mongoose jsonwebtoken bcrypt
We will have following package.json file after installing all dependencies.
{
  "name": "authentication_authorization_nodejs",
  "version": "1.0.0",
  "description": "",
  "main": "index.js",
  "scripts": {
    "test": "echo \"Error: no test specified\" && exit 1"
  },
  "keywords": [],
  "author": "",
  "license": "ISC",
  "dependencies": {
    "bcrypt": "^4.0.0",
    "config": "^3.2.6",
    "express": "^4.17.1",
    "joi": "^14.3.1",
    "jsonwebtoken": "^8.5.1",
    "mongoose": "^5.9.2"
  }
}
Step3: Make MongoDB Database Connection
Now we will configure database connection with MongoDB. We will create a directory config at the root of our application.
$ mkdir config
$ cd config
we will create a file database.config.js inside config directory. We will add following to database.config.js file.
module.exports = {
    url: 'mongodb://localhost:27017/products'
}
We will also create a file default.json inside config directory with following code.
{
 "privatekey": "privatekey"
}
Step4: Create Entry Application File
We will create our application entry file index.js at the root of application. We will add following code into this file. We will implement MongoDB database connection and check for privatekey.
const config = require("config");
const mongoose = require("mongoose");
const usersRoute = require("./routes/user.route");
const express = require("express");
const app = express();

if (!config.get("privatekey")) {
  console.error("FATAL ERROR: privatekey is not defined.");
  process.exit(1);
}

const dbConfig = require('./config/database.config.js');
mongoose.Promise = global.Promise;
mongoose.connect(dbConfig.url, {
    useNewUrlParser: true,
	useUnifiedTopology: true
}).then(() => {
    console.log("Successfully connected to the database");
}).catch(err => {
    console.log('Could not connect to the database. Exiting now...', err);
    process.exit();
});

app.use(express.json());
app.use("/api/users", usersRoute);

const port = process.env.PORT || 3000;
app.listen(port, () => console.log(`Listening on port ${port}...`));
Step5: Create User Models
We will create a directory models at the root of our application.
$ mkdir models
$ cd models
Then we will create a file user.models.js inside models directory and following code to define user schema. We will create a function validateUser() to validate required fields.
const config = require('config');
const jwt = require('jsonwebtoken');
const Joi = require('joi');
const mongoose = require('mongoose');

const userSchema = new mongoose.Schema({
  name: {
    type: String,
    required: true,
    minlength: 3,
    maxlength: 50
  },
  email: {
    type: String,
    required: true,
    minlength: 5,
    maxlength: 255,
    unique: true
  },
  password: {
    type: String,
    required: true,
    minlength: 3,
    maxlength: 255
  },
  isAdmin: Boolean
});

userSchema.methods.generateAuthToken = function() {
  const authToken = jwt.sign({ _id: this._id, isAdmin: this.isAdmin }, config.get('privatekey'));
  return authToken;
}

const User = mongoose.model('User', userSchema);

function validateUser(user) {
  const schema = {
    name: Joi.string().min(3).max(50).required(),
    email: Joi.string().min(5).max(255).required().email(),
    password: Joi.string().min(3).max(255).required()
  };

  return Joi.validate(user, schema);
}

exports.User = User;
exports.validate = validateUser;
Step6: Create Middleware Authentication
We will create a directory middleware at the root of our application.
$ mkdir middleware
$ cd middleware
We will create file auth.js inside middleware and add following code. In this middleware, we will check if there is an existing and valid token present in the request header to identify the user.
const jwt = require("jsonwebtoken");
const config = require("config");

module.exports = function(req, res, next) {
  const authToken = req.headers["x-access-token"] || req.headers["authorization"];
  if (!authToken) return res.status(401).send("Access denied. No token provided.");
  try {
    const decoded = jwt.verify(authToken, config.get("privatekey"));
    req.user = decoded;
    next();
  } catch (ex) {
    res.status(400).send("Invalid token.");
  }
};
Step7: Create User Routes
We will create a directory routes at the root of our application.
$ mkdir routes
$ cd routes
We will create a file user.route.js and add following code. We will handle this to register user with authentication.
const auth = require("../middleware/auth");
const bcrypt = require("bcrypt");
const { User, validate } = require("../models/user.model");
const express = require("express");
const router = express.Router();

router.get("/current", auth, async (req, res) => {
  const user = await User.findById(req.user._id).select("-password");
  res.send(user);
});

router.post("/", async (req, res) => {
  const { error } = validate(req.body);
  if (error) return res.status(400).send(error.details[0].message);

  let user = await User.findOne({ email: req.body.email });
  if (user) return res.status(400).send("User already registered.");

  user = new User({
    name: req.body.name,
    password: req.body.password,
    email: req.body.email
  });
  user.password = await bcrypt.hash(user.password, 10);
  await user.save();

  const token = user.generateAuthToken();
  res.header("x-auth-token", token).send({
    _id: user._id,
    name: user.name,
    email: user.email
  });
});

module.exports = router;
Step8: Run Application
Now finally we will run our application using following command.
node index.js
when our application, it will display following:
Listening on port 3000...
Successfully connected to the MongoDB database...
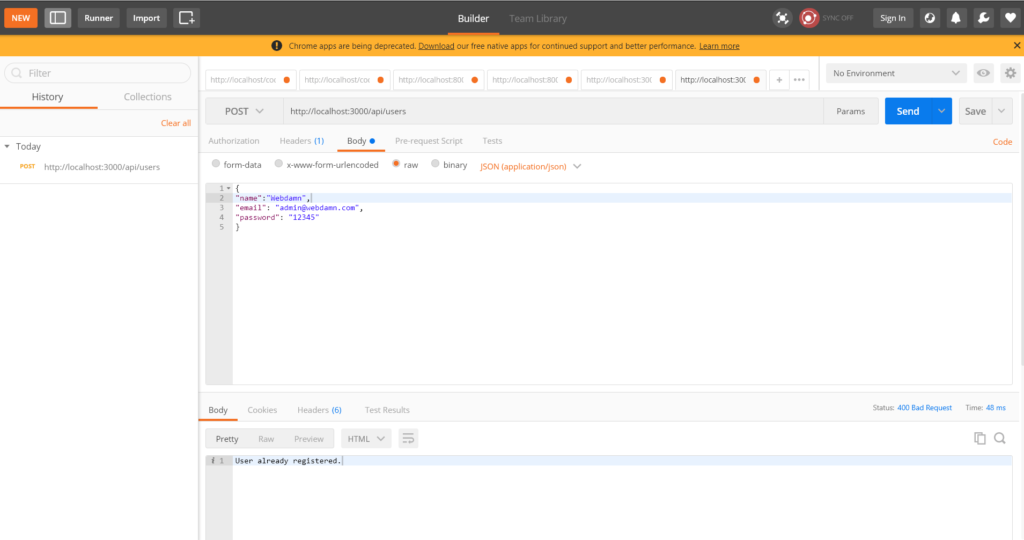
Step9: Running Application with POSTMAN
Now we will run our user authentication application on POSTMAN App to check user authentication.
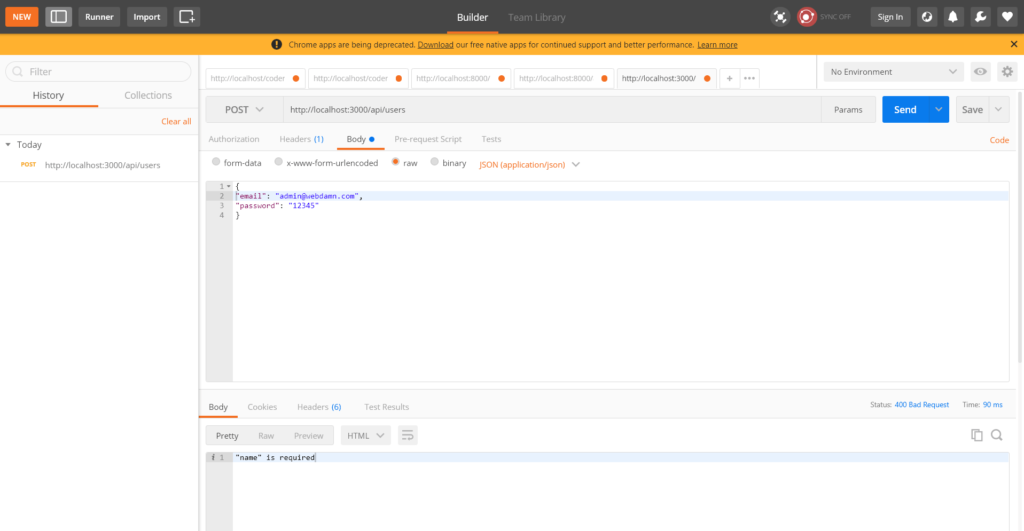
Register user with required name field validation
Register user with required email field validation

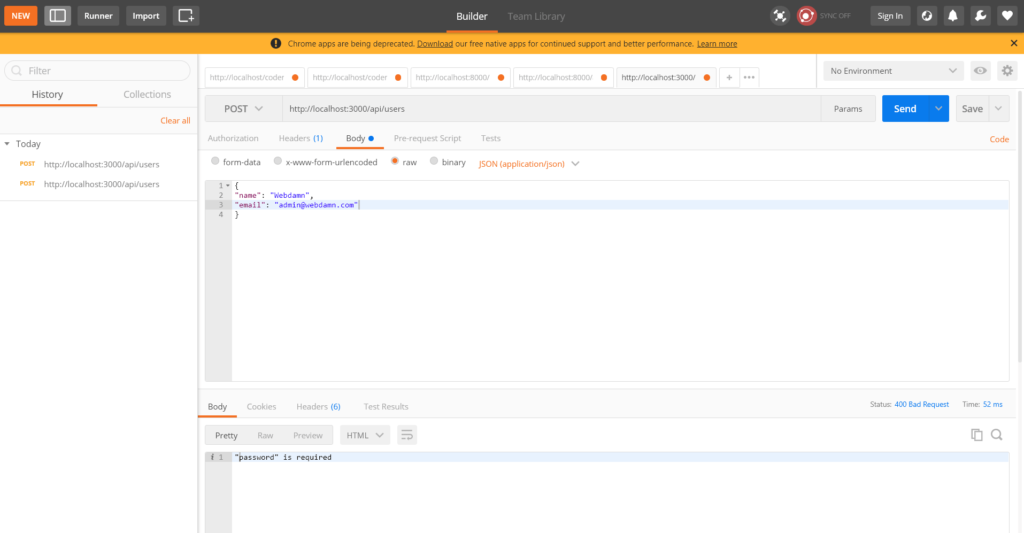
Register user with required password field validation
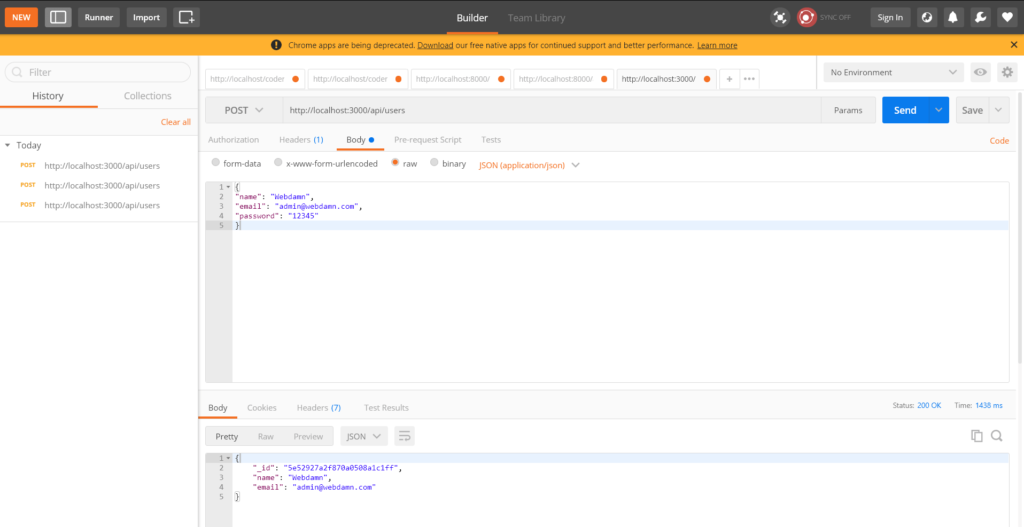
Register user with all required fields
Validate user already exist
You may also like:
- How to Install Node.js on Windows
- How to Install Node.js on Ubuntu
- Amazon S3 File Upload using Node.js
- Upload Multiple Image File with Node.js
- Scrape Search Data with SERP API using Node.js
- Create REST API with Node.js, Express & MongoDB
- User Login and Registration with Node.js, Express & MySQL
- User Authentication and Authorization with Node.js
- Chat Application with Node.js, Express & MongoDB
You can download the source code from the Download link below.
Download